Dealing with Water Rings and Heat Damage on Antique Furniture
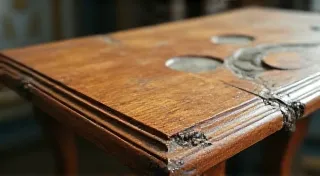
Water rings and heat damage are common culprits behind the faded beauty of antique furniture. They’re a frustrating sight for anyone passionate about preserving these treasured pieces, but thankfully, they aren't always permanent. This guide will explore techniques to effectively remove or significantly minimize these imperfections, restoring the aesthetic appeal of your antique furniture.
Understanding the Damage
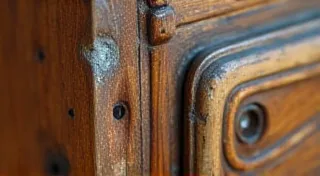
Before diving into restoration methods, it's crucial to understand *how* these marks appear. Water rings occur when moisture penetrates the finish of the furniture, often due to spills or condensation. The water pushes the finish away from the wood, leaving a visible ring. Heat damage, conversely, is caused by prolonged exposure to heat from objects like lamps, hot dishes, or even sunlight. Heat weakens the finish, causing it to cloud, blister, or even peel. The complexity of antique finishes often requires specialized knowledge, and understanding the type of finish (French polish, shellac, lacquer, varnish) is key to successful repair. You might find it helpful to consult resources that delve into stripping old finish from antique furniture before attempting any repair, as understanding the existing finish is critical to choosing the appropriate restoration method.
Assessment: Is It Salvageable?
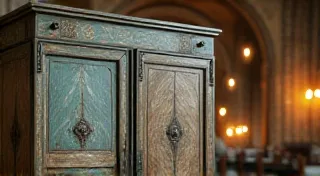
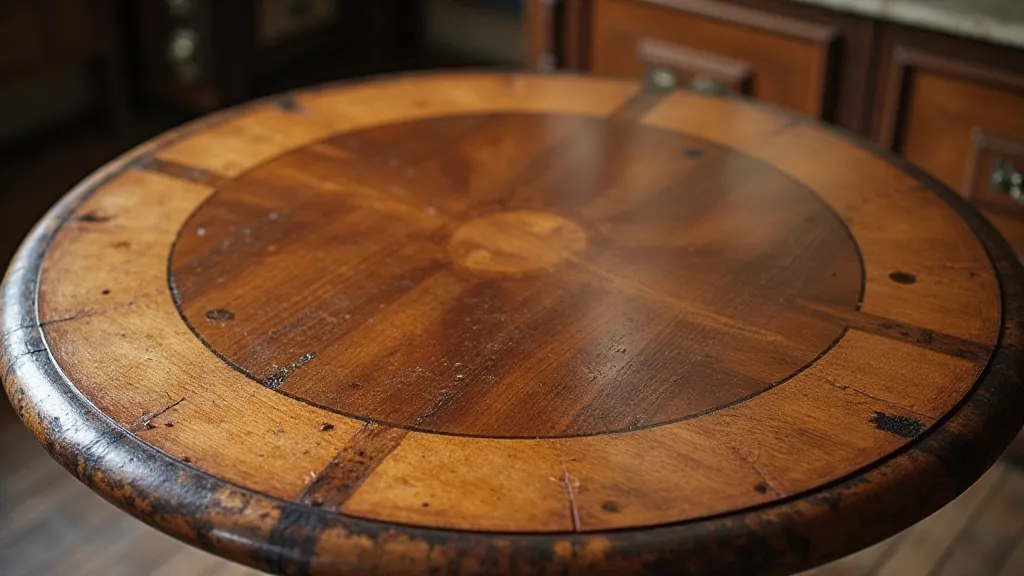
Not all water rings and heat damage can be completely removed. The severity of the damage, the type of finish, and the age of the furniture all play a role. A light water ring on a well-maintained French polish finish might be reversible, while extensive heat damage to a heavily distressed piece might require more significant repairs or even replacement of the affected area. Carefully assess the damage before proceeding. Before attempting any removal methods, considering the underlying structure and construction of the furniture piece is vital. Understanding the period style, if possible, can also inform the restoration approach; some older pieces warrant a more cautious approach than others. You might be interested in identifying period styles in antique furniture to better understand the piece's historical context.
Techniques for Water Ring Removal
Here are a few methods to tackle water rings, starting with the gentlest approaches:
- Hair Dryer Method: This is often the first line of attack. Using a hairdryer on a low heat setting, gently move the nozzle across the water ring. The warmth can help draw out the trapped moisture. Don’t hold the hairdryer in one spot for too long to avoid further heat damage.
- Ironing Method: Place a thick cloth (like a cotton towel) over the water ring. Set an iron to a low setting (no steam!) and gently iron over the cloth. The heat will draw the moisture out, hopefully minimizing the ring. Again, be cautious about excessive heat.
- Mayonnaise/Petroleum Jelly: Sounds odd, but these oily substances can sometimes draw out moisture. Apply a thin layer over the water ring, let it sit for a few hours (or even overnight), and then wipe away. The oils penetrate the finish and displace the water.
- Steel Wool (Very Fine Grade – 0000): This should be a last resort and requires extreme caution. Use *very* fine steel wool (0000 grade) *gently* rubbed with mineral spirits. This will lightly abrade the finish and may remove the ring, but it will also remove some of the original finish. Always test this method in an inconspicuous area first, and be aware that aggressive rubbing can damage the surrounding finish.
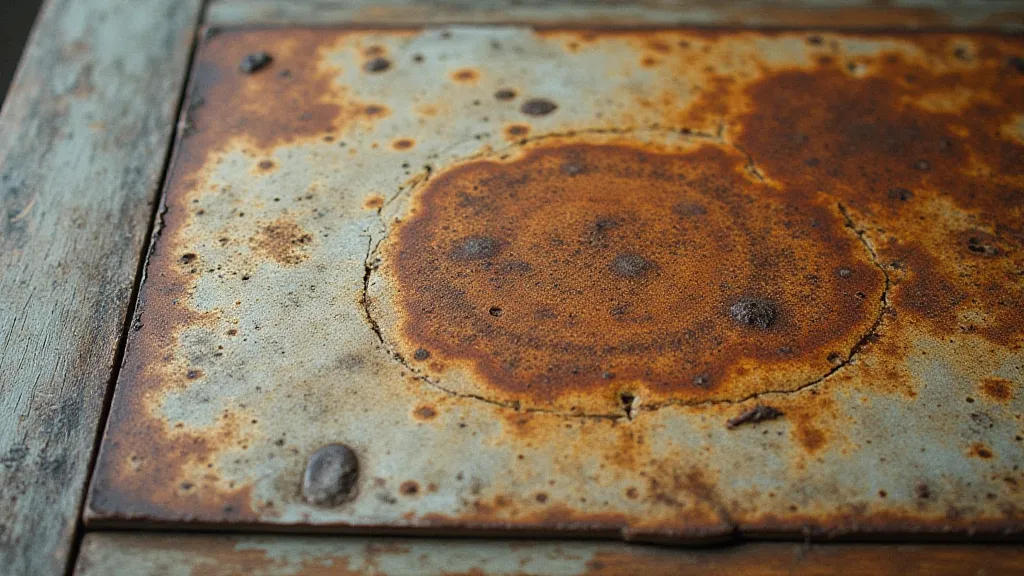
Dealing with Heat Damage
Heat damage is generally more difficult to repair than water rings. It often involves more than just surface treatment; the finish is fundamentally altered, and sometimes the wood itself is affected. Here are some approaches, keeping in mind that complete restoration may not be possible:
- Gentle Cleaning: Start with a mild, furniture-safe cleaner to see if the cloudiness is just surface grime. Sometimes, a simple cleaning with appropriate cleaning agents can alleviate minor clouding.
- Re-Polishing: A complete re-polishing can often improve the appearance of heat-damaged areas, but it's a time-consuming process. It involves stripping the old finish, applying fresh stain (if necessary), and applying multiple coats of a new finish. This process requires a significant investment of time and skill. For complex finishes, understanding the layers involved and the correct application techniques is crucial.
- Localized Patching: For more severe heat damage, you might be able to patch the affected area. This involves carefully removing the damaged finish, staining the area to match the surrounding wood, and applying a new finish. This is best left to experienced restorers. This can involve intricate techniques like veneer patching, particularly if the heat has warped the wood.
Important Considerations & Precautions
Restoring antique furniture is a delicate process that demands patience and careful attention to detail. Here are some crucial considerations to ensure a successful outcome and avoid further damage.
- Test in an Inconspicuous Area: Before applying any treatment to a visible area, always test it on a hidden spot (like the underside of a drawer) to ensure it doesn't cause further damage. This is paramount; what works on one piece might ruin another.
- Work Slowly and Gently: Rushing the process or applying too much pressure can worsen the damage. Antique furniture has often survived for centuries; a little extra time and care will only increase its longevity.
- Ventilation: When using solvents or finishes, always work in a well-ventilated area. Many restoration materials release harmful fumes.
- Consider Professional Help: For valuable or particularly delicate pieces, it’s always wise to consult with a professional furniture restorer. They have the expertise and tools to handle complex restorations safely and effectively. Incorrect restoration attempts can significantly devalue an antique piece.
- Understanding the Construction: Examining the construction techniques can offer clues about the furniture’s age and origin. Dovetail joints, for example, are a telltale sign of quality craftsmanship and can influence the restoration approach.
- Repairing Veneer: Heat can often damage veneer, especially on older pieces. If the veneer is lifting or cracked, specialized repair techniques may be required. The process of veneer repair for antique furniture can be complex, often requiring re-gluing, patching, or even replacement of sections.
Prevention is Key
Once you’ve restored your antique furniture, take steps to prevent future damage. Proactive measures are far more effective than reactive repairs.
- Use Coasters and Placemats: Protect the surface from spills and heat. Always use coasters under drinks and placemats under hot dishes.
- Avoid Direct Sunlight: Prolonged exposure to sunlight can fade finishes and damage wood. Position furniture away from direct sunlight or use curtains to filter the light.
- Maintain Proper Humidity: Extreme fluctuations in humidity can warp wood and crack finishes. Use a humidifier or dehumidifier to maintain a stable humidity level.
- Regular Dusting: Dust and debris can scratch the finish over time. Regular dusting with a soft cloth is essential.
- Proper Support: Ensure furniture is placed on stable surfaces to prevent tipping and accidental damage.